Listen, we all know that feeling of paranoia when we leave the house and wonder if everything is okay. Did we remember to lock the doors? Did we turn off the stove? And what about that package that's supposed to arrive today - will it still be there when we get back?
Well, if you're anything like me, then you want to do everything in your power to ease those worries and keep your home safe and secure. And that's where Blue Iris comes in.
In this blog post, I want to share with you my experience of installing Blue Iris on my home server. Blue Iris is like a personal bodyguard for your home - it lets you monitor and manage your security cameras from a single location, so you can keep an eye on everything and anything that might be going on.
Now, I know what you're thinking - "installing security camera software? That sounds complicated!" But fear not, my friend - I'm here to guide you through the process step by step. In this post, I'll show you just how easy it is to set up Blue Iris on your home server, and provide some helpful tips along the way.
So, if you're ready to bring some peace of mind to your home security system and maybe even feel a little bit like James Bond in the process, let's get started!
Install Windows 10 onto Proxmox Virtual Machine
- Download the Windows installation file onto your computer
- Navigate to: local (proxmox) > ISO Images
- Click
Uploadand select the Windows 10 ISO image - Let's download the drivers needed for this installation. Go to this Github repository to download the VirtIO drivers
Or
- Directly download the Latest virtio-win ISO here
- Click
Uploadand select the VirtIO ISO image - Click
Create VM
General
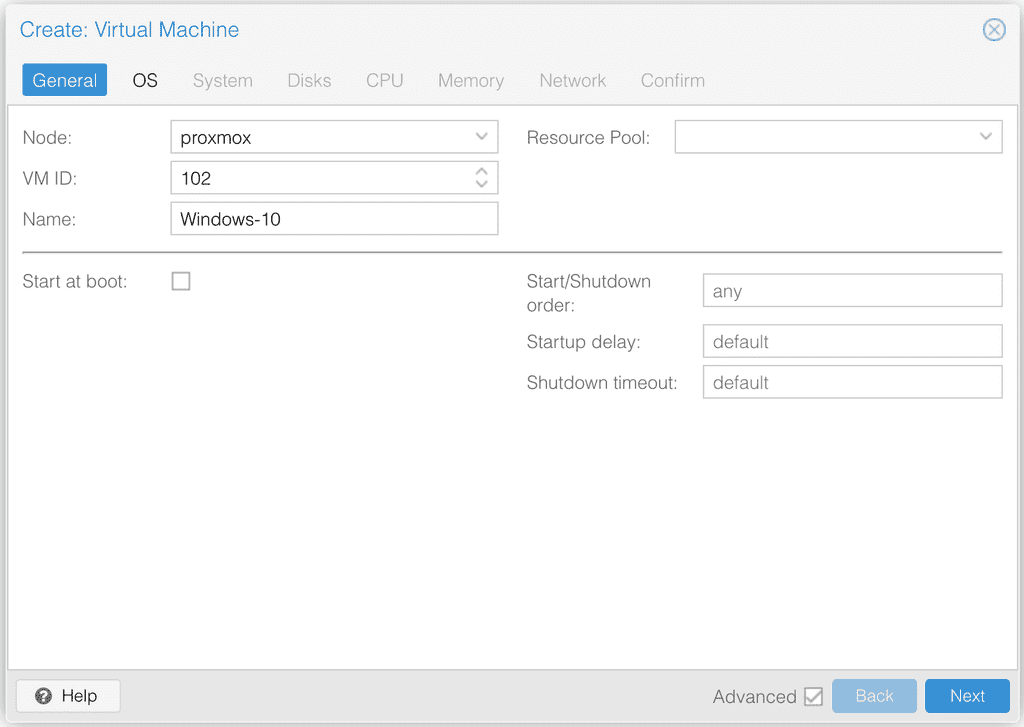
- VM ID: 102
- Name: Windows-10
OS
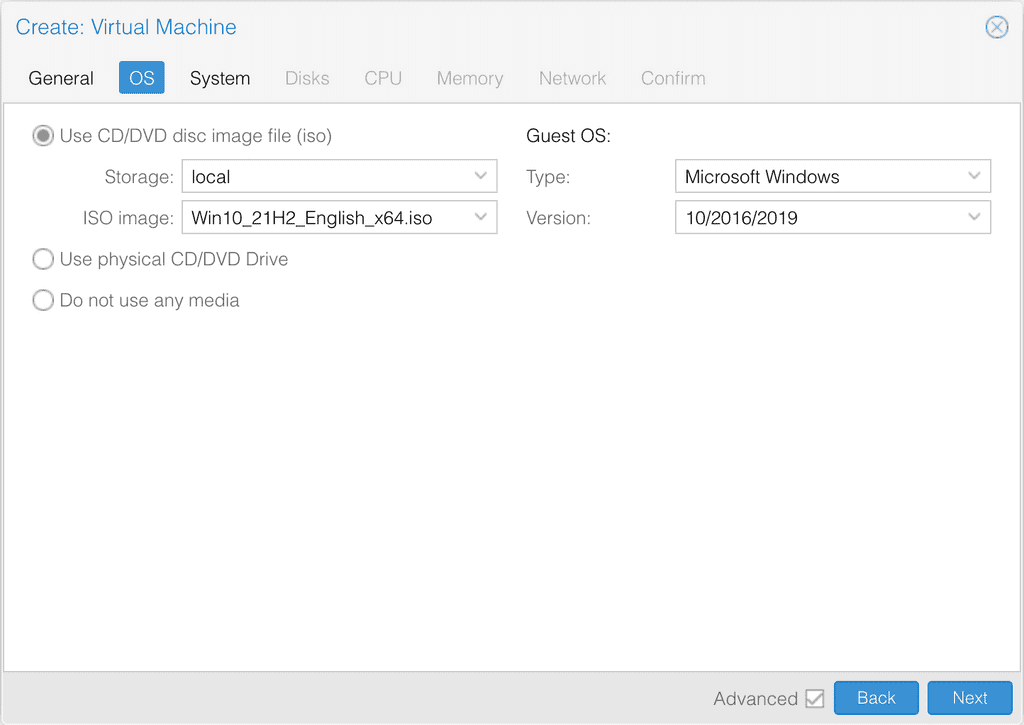
- Storage: local
- ISO image: Win10_21H2_English_x64.iso
- Type: Microsoft Windows
- Version: 10/2016/2019
System
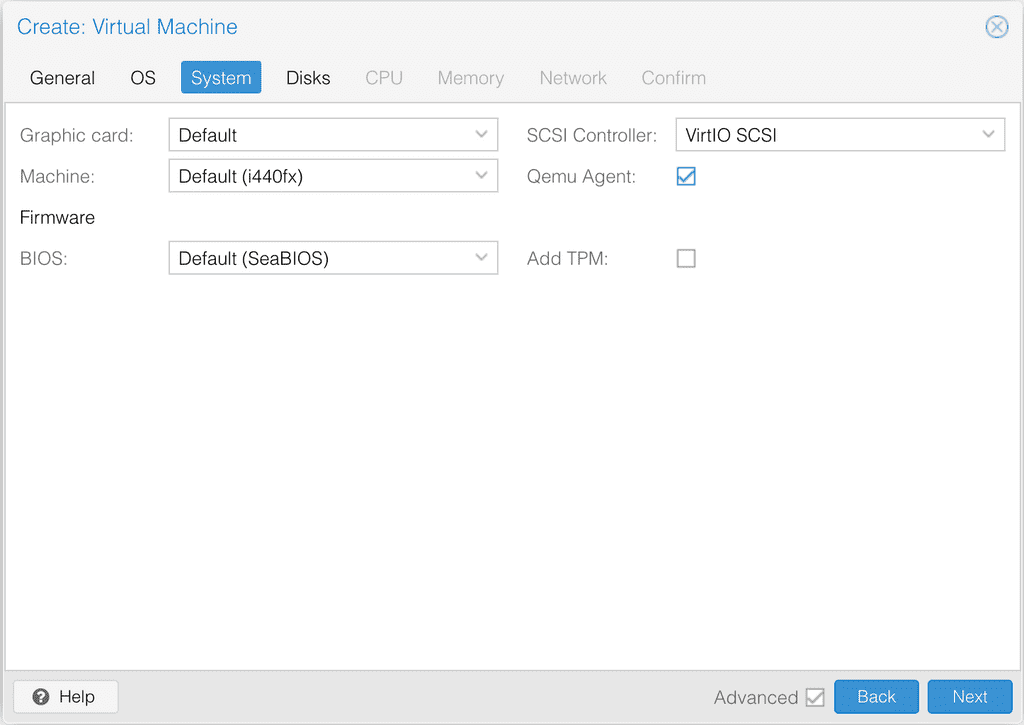
- Qemu Agent: Checked
Disks
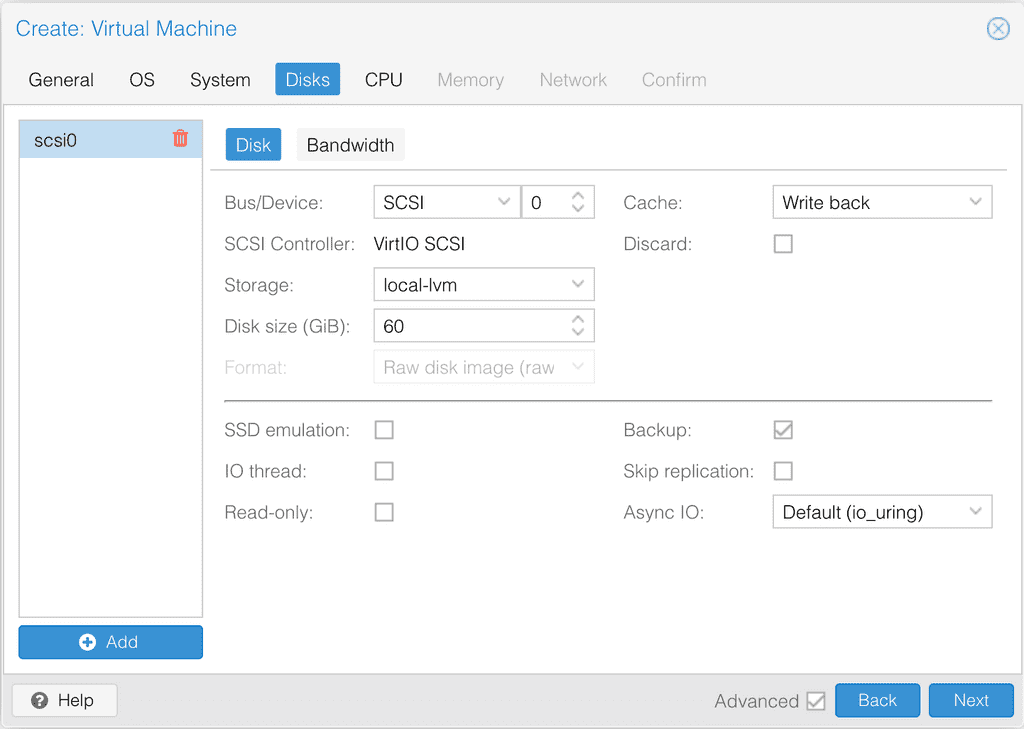
- Bus/Device: SCSI
- Storage: local-lvm
- Disk size (GiB): 60
- Cache: Write back
CPU
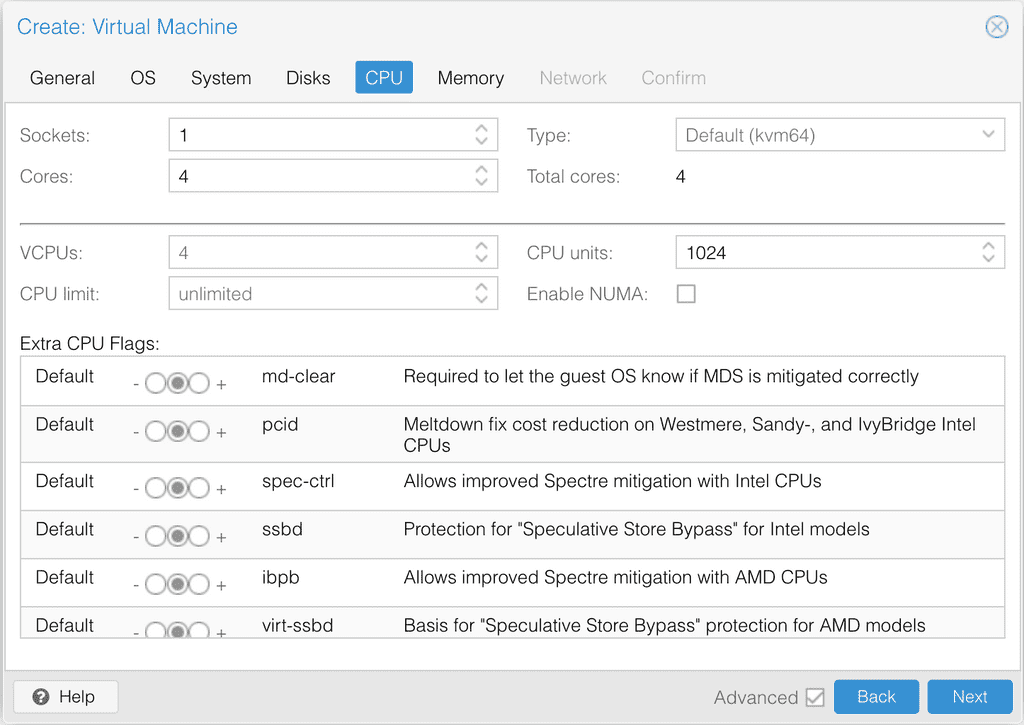
- Cores: 4
Memory
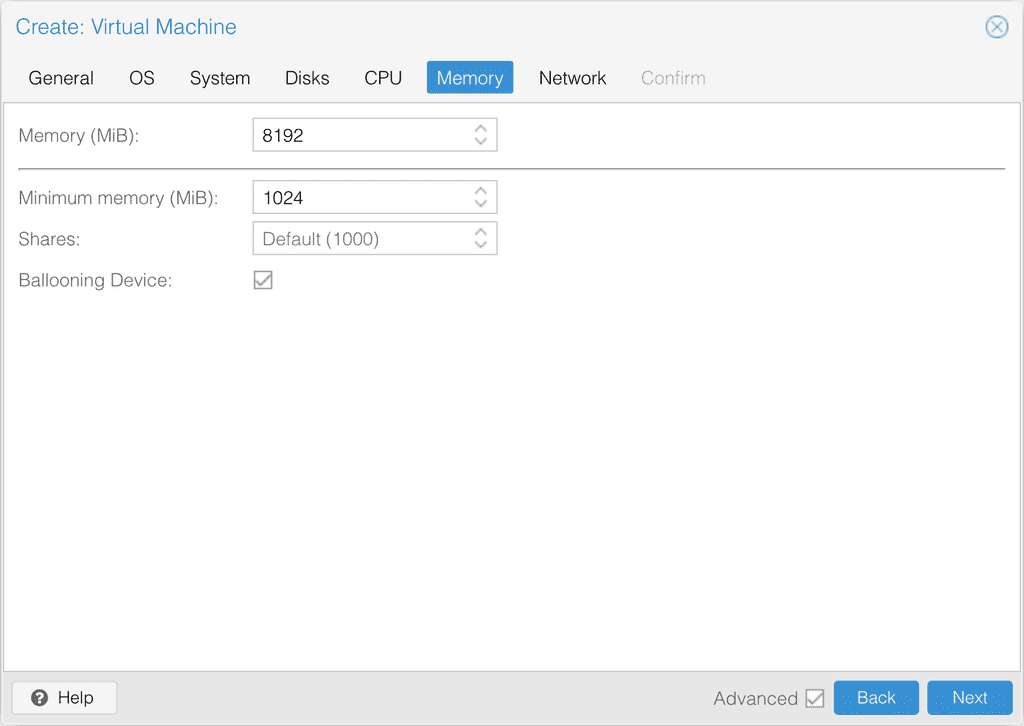
- Memory (MiB): 8192
- Minimum memory (MiB): 1024
Network
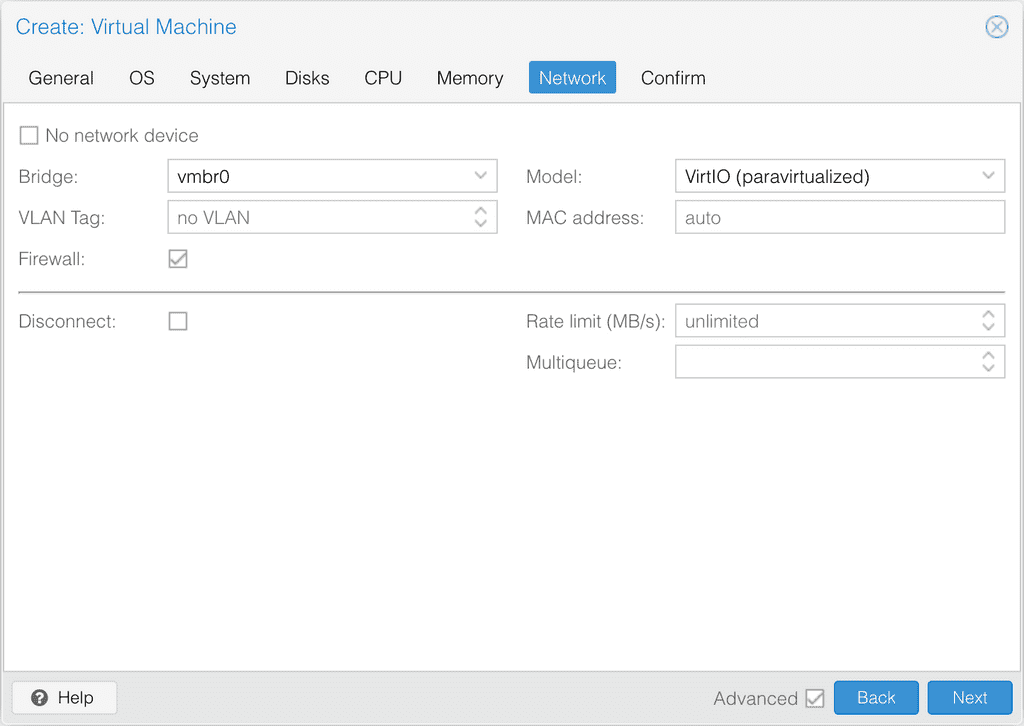
- Model: VirtIO (paravirtualized)
Confirm
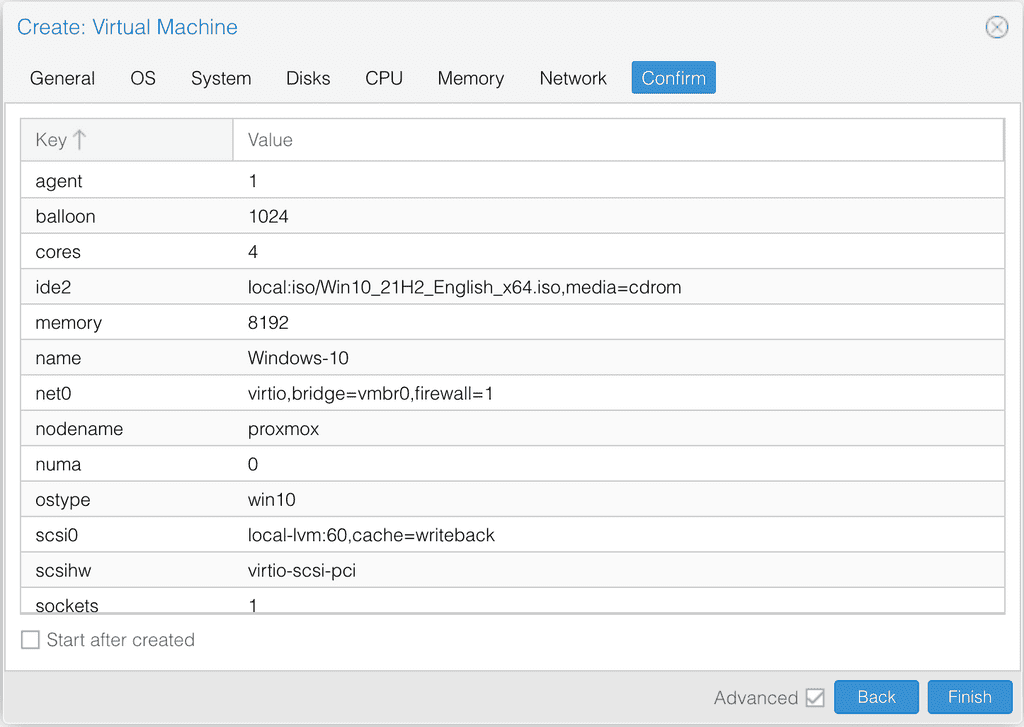
- Finish
- Navigate to: 102 (Windows-10) > Hardware
- Click
Addand select CD/DVD Drive
Add: CD/DVD Drive
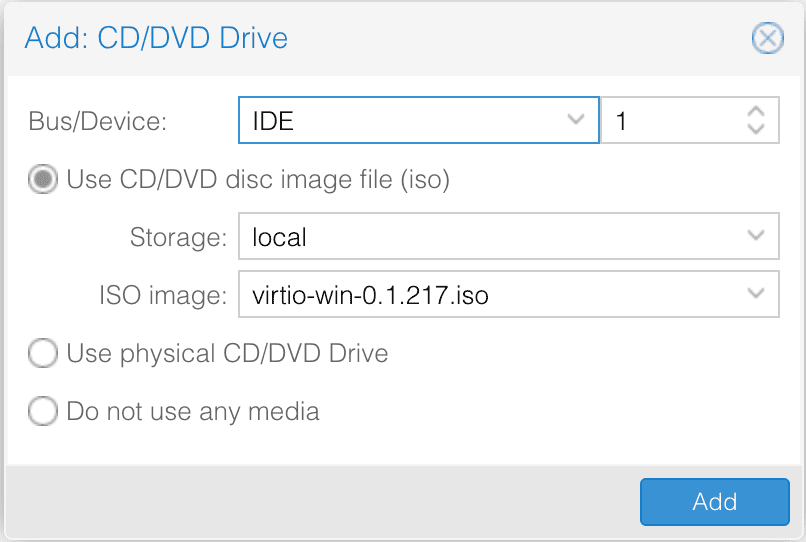
- Bus/Device: IDE 1
- Use CD/DVD disc image file (iso):
- Storage: local
- ISO Image: virtio-win-0.1.217.iso
- Add
Right-click 102 (Windows-10) and select Start
Begin normal Windows installation until you get to:
- Select Custom: Install Windows only (advanced)
- Load driver > Browse > Select CD Drive (D:) virtio-win-0.1.217
- vioscsi > w10 > amd64 > Next
- Load driver > Browse > Select CD Drive (D:) virtio-win-0.1.217
- NetKVM > w10 > amd64 > Next
- Load driver > Browse > Select CD Drive (D:) virtio-win-0.1.217
- Balloon > w10 > amd64 > Next
After all drivers above are loaded, click
NextAfter logging into Windows:
- Right-click
Startbutton > Device Manager > Other devices > Click PCI Simple Communications Contoller - Update Driver > Browse my computer for driver software
- Browse > Select CD Drive (D:) virtio-win-0.1.217
- Click
Ok>Next
- Click
- Right-click
Install Guest Agent
- Browse to CD Drive (D:) virtio-win-0.1.217
- guest-agent > qemu-ga-x86_64
Search for Remote Desktop settings
- Enable Remote Desktop
